Monday, September 26, 2011

Tutorial: How to Fail at Quilting

Dearest friends...

I wish I could tell you that I had this post in mind when I first started quilting the puzzle quilt I'm making for Autumn. If only I had decided to completely mess up a quilt so that I could learn what NOT to do and tell you all about it. Unfortunately this post didn't come to mind until today when I realized I had to hack off about 1/4 of my quilt to make it (kind of) work.

As I finished the "quilting" process and looked at what a mess I'd made, I came to a lot of conclusions about how poorly I went about this entire process. SO! If you're a first time quilter (like I was) and are wondering exactly what you're NOT supposed to do, keep on a readin'. :) And if you're an experienced quilter, feel free to laugh at all the ridiculous "newbie" mistakes I've made... (can you tell I've been watching Scrubs re-runs for the past 3 weeks?!)

The "HOW TO FAIL AT QUILTING" Tutorial


1. Don't read any tutorials on how to quilt. If you know how to thread your sewing machine, you know how to quilt. Fact.   

2. Pick a large quilt size. That's right, if you want to fail at your first quilt, jump into a project that's clearly too advanced. Nothing's easier than maneuvering 5-10 pounds of material and batting around and through your tiny little sewing machine.

3. Don't read all of the instructions before you start cutting. Yep, just start hacking at your expensive materials and assume everything will come out okay. Oh, and, don't bother counting how many of each piece you need or how many you have, it'll all work out in the end.

4. Assume your pressure foot measures a perfect 1/4 inch seam. Your sewing machine's manual is clearly written in blood and is obviously the ABSOLUTE truth. So, don't worry about measuring out your seams a couple of times to make sure they're accurate. They will be. 

5. Don't start over. When you get through the first 4 blocks and realize you're at least 1 inch off on all of them, don't you dare take out that seam ripper. You just keep on keepin' on, even if every block is a different size. 

6. Iron your fabric. Don't press them! Ironing causes your fabrics to distort. Pressing keeps them crisp and even. Clearly you want to iron them. 

7. Don't worry if your quilt top's seams aren't at all lined up. The quilting process with fix that.

8. Don't use too many basting pins. You only need one for every row or so. That should totally hold 50 inches of material in place.

9. Listen to the random lady in the craft store on how to quilt. Little old lady: "Quilting is so much fun. All you have to do is make squiggly lines all over your quilt so that no one can see how badly you messed up." Me: "Oh, really? And I can use my walking foot for that?" Little old lady: "Mhmmmmm." Yes, those awesome squigglies that you see on those beautiful quilts are totally done with a walking foot... NOT a darning foot. Please don't get confused. 

10. Make sure your quilt top, the batting, and the backing are all the same size before you start quilting. Doing this ensures that you will probably need to hack off at least a row or your quilt. I always love wasting things that I've spent a TON of time on. 

11. Don't start quilting in the middle of the quilt. You should start on one end and finish on the other. Especially if you've made your top, batting, and backing all the same size. If you do this, not only will you need to hack off a row, but also a column. What fun! 

------------------------------------------------------------------------------------

Don't laugh. Okay, you can laugh. YES I ACTUALLY DID MAKE ALL OF THOSE MISTAKES! But I have an excuse... 

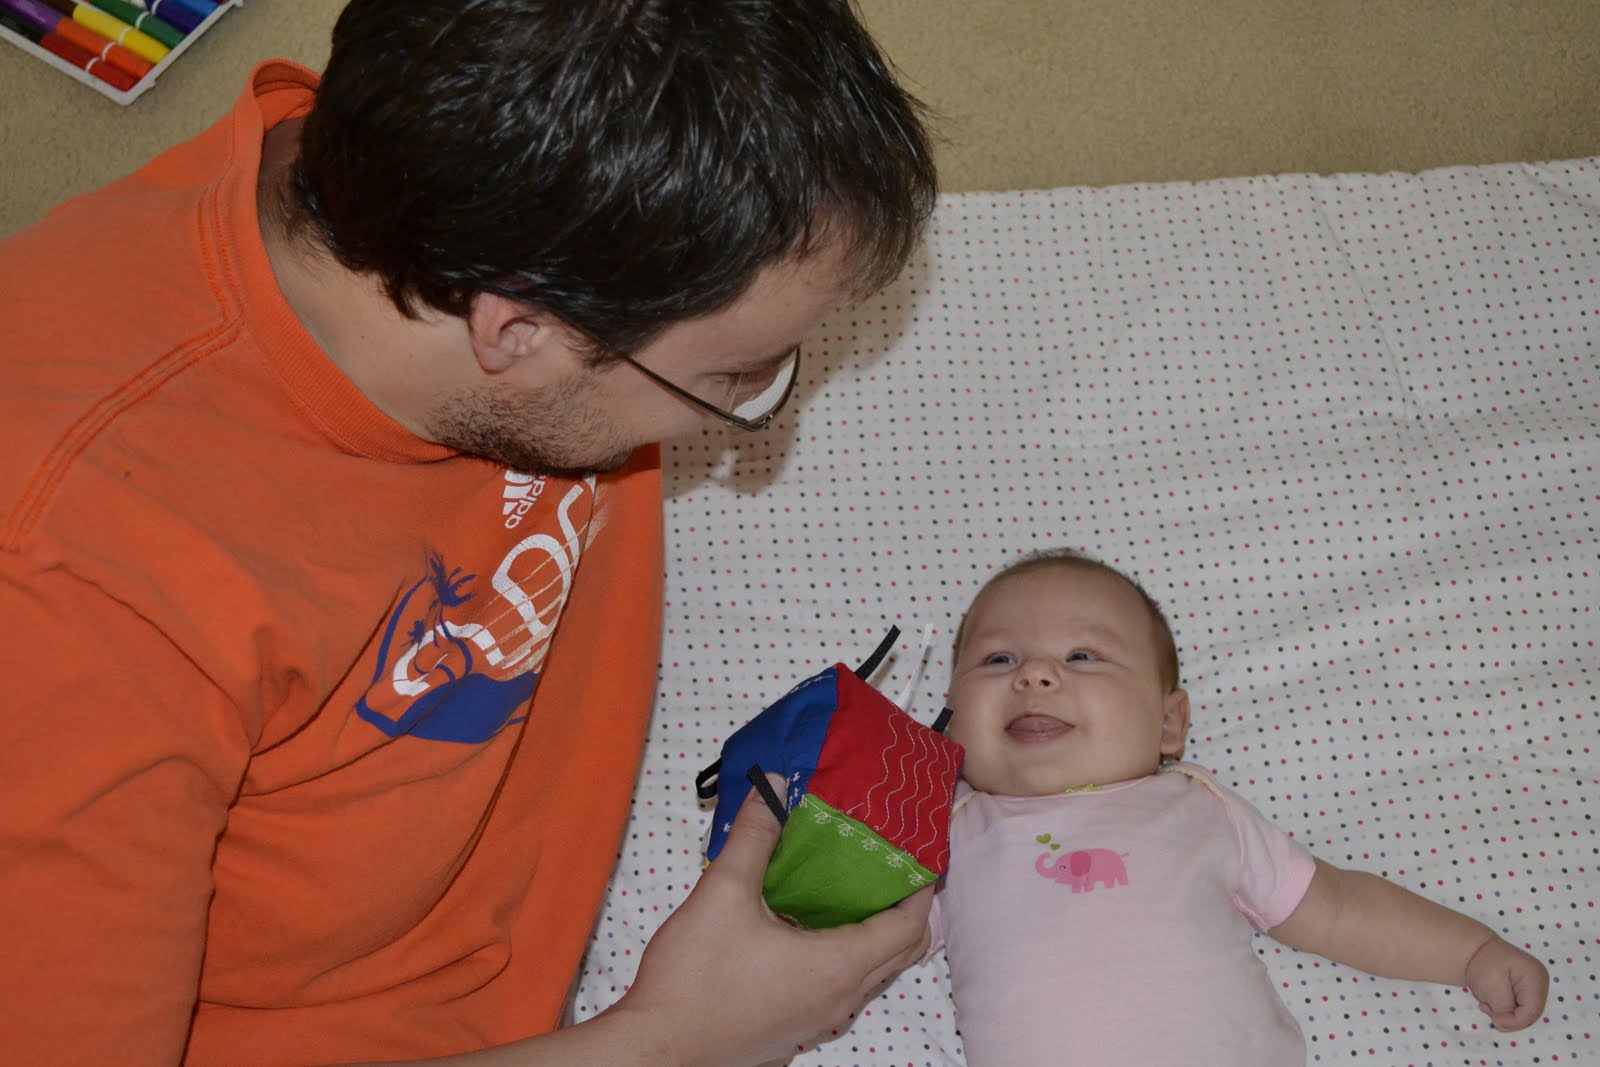
I just had a baby and I have a serious case of the mom brains! Can you blame me? Not to mention, who has time to pay really close attention to quilting details when you've got this awesome face to look at!?! 


All kidding aside, though, there are a lot of great quilting resources out there for free. I would really suggest reading them every step of the way when learning to quilt. And, even though I've royally failed at making this first quilt, I am definitely in the mood to persevere.... with a much smaller project. And then of course, I'll be attempting to make twin sized quilts for my nieces for Christmas. Yep...

Until next time,
Amy

Saturday, September 10, 2011

Productivity and a sneak peak at what's to come!


The business cards, labels, and new fabric have arrived. Be sure to click on the fabric link. They are sooo cute, don't you think?

Looky Looky! This is the design I made for the cards.

This is what the back of the business cards look like. Half have the first design. Half have the second.


Here's what the labels look like. These are for packaging orders so that they look professional and pretty.
And here is the first set of items I've completed sewing and am ready to list in my shop as soon as I get more items finished. I don't just want to list one thing at a time, I want to have a pretty decent stock up first.

What do you think?! It's a set of 3 chenille backed burp cloths. :)


And the two other things I've made are a stuffed cube and a quilted taggy toy. :)

I haven't taken great pictures of those, yet, but when I do I'll post them up.

Until next time,
Amy

Wednesday, September 7, 2011

WWW: Finished Quilt Top!!

I've finished the quilt top. What do you think?!?! I know you probably can't tell but the seams are REALLY off. Luckily this quilt is built in a way that from a distance the mistakes are easily missed. :)

I had a fun time making it. Also, since my stitching was so off and the quilt is so much smaller, I was able to make the backing out of 1 piece of material without having to sew 2 pieces together. I'm pretty glad about that. I'm headed to A.C. Moore right now to get some basting pins so that I can put it all together tonight. I think I know the quilting pattern I'm going to use, but I'm really nervous about how it's going to turn out. We shall see I suppose. :)

Here's the picture!

Mmmm, Dan's lower legs. Seeexaaay. ;)


Until tomorrow,
Amy

Tuesday, September 6, 2011

Getting Organized

So Dan and I have too much crap. Somehow, after a year of living in this apartment, we've just accumulated more and more junk. I can't even blame the baby. She takes up one dresser, which we already owned, two buckets for toys and blankets, a swing and a bouncy seat. I'm not counting the crib and rocking chair since those are clearly necessities.

Anyway... we have a list of places to sort through so that we can hopefully get rid of at least 1/4 of what we own. Here's our list (well, it's my list since Dan doesn't make lists...and I'm OCD about them):

Bookshelves
Pantry
Cabinets
Dan's Clothes
Amy's Clothes
Storage Closet
Bedroom Closet
Dining Room (a.k.a. my craft space)

I don't have a lot that I can get rid of from my makeshift craft space, but I am trying to reorganize so that everything I have to use is in eyesight. I tend to forget things that I buy to use... especially when they're in a bag underneath my vanity (yep... that was my previous fabric spot).

I used to be crazy about the house looking very tidy whenever people come over. Now that we have Autumn, I'm much less crazy about it. Hence why my dining room no longer works as a dining room. Dan and I eat at the coffee table every morning, noon, and night. Whatev. I needed a space to call my own and be creative and not have to worry about putting everything back in a container and shoving it back into the closet every night. Having to do that really put a damper on my will to create.

Here are some drool-worthy, totally organized, beautiful craft spaces that I've found through Pinterest recently. I can't wait to have a house with an actual craft room. Oh, to dream. :)

Enjoy!

Source: Nicole Magouirk

In a small space? Repurpose a closet! Source: wanelo

Source: create4me at scrapbook.com

My favorite since it's catered towards what I do. Source: Sew Many Ways
Until Tomorrow... HOPEFULLY THE QUILT TOP WILL BE FINISHED! Going to do that now...

Amy

Monday, September 5, 2011

MM: Weigh-in 4?

So, I'm glad I'm not alone in my serious need for sugar. Other moms I know seem to crave it just as much as I do. Maybe it's a breastfeeding thing. Maybe it's because I ate pretty much whatever I wanted during pregnancy and now it's hard to break the habit. I'm not sure what the reason is... but it's a really difficult thing to overcome.

Amount gained or lost:  

-0. I'm steady at my start weight. Someday it will decline... like this week, hopefully.

What were my obstacles last week?

I have zero self-control when it comes to desserts. Seriously... never let me go to the store alone after dinner. It's bad. 

What are my goals for this week?

Stop eating out so much.
Eat yogurt for dessert. NOT ice cream.
Exercise 5 days.


Any random thoughts on weight-loss last week?

I finally remember what my thought about exercise was... Here goes: 

The only exercise I've ever really done has been through team sports. I played soccer, hockey, and volleyball, took Tae Kwon Do, and danced. I did most of those until I was 14. From 14-15 I went to the gym everyday... but I wasn't all that excited about sitting at home and I didn't have any friends so it was the only way I could get out of the house. At 15 I started playing soccer again for 3 years. But, when I got to college... I didn't have any regular sport team that required intense physical training. When I lived in China for my last 2 years of high school I only played sports 2 days a week and not even for the whole year. But 3-4 nights a week, a group of my friends and I would go dancing for 3-4 hours. And that is a serious work-out. I would always leave there sweating like crazy and feeling like I'd worked every bit of my body. 
Anyway... my point is that I feel VERY unmotivated to do regular exercise because I don't have a team to do it with and a goal (other than weight loss) to achieve. It's frustrating, but I need to get over it. 

My second thought is: I have been switching to all-things "natural". Cloth diapers and wipes for Autumn, natural beauty products for me, organic milk, eggs, vegetables, and meat (when we can) for the family. I'm obsessed with trying to recycle everything that I possibly can now. But the other day I realized that even though I buy organic foods and natural products because I know it's better for my body, I still let myself indulge is TOTAL junk... like Doritos and Ben and Jerry's. Yeah... it's a conundrum that needs to be solved ASAP. 

That's all. :)

What's this week's mantra?

Take it one step at a time.

Any changes to the plan?

Well.. I was walking over a mile, but my chiropractor told me I need to start at 1/2 mile first because of my hip/pelvic/lower back issues. So, I'll be starting 1/2 mile tomorrow morning. Wish me luck. If I can go a week without being sore (not muscle sore, but my issues kind of sore) then I can increase to 3/4 mile the next week and then 1 the week after that. 
 
 
---------------------------------------------------------------
 On a different note, I've changed my list of things to accomplish by my next birthday. See below: 

And here's a picture of Autumn meeting the cat and finally seeming somewhat interested in her. :) 

Until Tomorrow,
Amy

Wednesday, August 31, 2011

WWW: Learning to Be a Beginner

There are two words that can describe me quite accurately when it comes to learning a new skill: stubborn and lazy.

When I graduated from college I received a "Senior Superlative" from my classmates that dubbed me:
Most Likely to Skip Class but Still Help You Study for the Exam.

It's missing the A.


It's true. I probably attended about 50% of my classes and managed to get either the highest or second highest score in every one of them (in Junior and Senior year, that is). The level of effort that I had to apply in order to do well on tests was pretty minimum. Don't get me wrong, I did have a full schedule and I did work hard. I had a full time job. I was in a lab. I helped T.A. a class. I tutored people on the side. I was in a couple clubs. I wrote an Honors Thesis. My college degree didn't come easy, but my test grades always did.

I'm not bragging. The reason I did so well was because I was extremely interested in the topics I was learning. I loved everything about Speech and Hearing sciences. I soaked up everything that was introduced almost immediately. It was EASY for me to learn the material because I just UNDERSTOOD it.

That's how I want everything that I'm interested in to be. I want to be able to be the best quilter, the best seamstress, the best home decorator, the best photographer, the best knitter, etc. Seriously, I want to be the best at all things creative. I can't ever decide on one thing that I want to devote my time to because I love it all. But recently I realized that I can't be the best at everything. I can be good at anything I want, but I can't be the best at everything.

I hate that. I can't deal with that. Actually, my brain is hurting thinking about that.

I am making a quilt right now for Autumn. It's supposed to measure out at the end at 48" x 60". It's going to be closer to 40" by 50". I just couldn't get the seams correct on all my 9-piece blocks. I'm partially apathetic to this and partially really annoyed with myself. I keep thinking, "man, I should really give up on quilting after this one. I clearly am not cut out for this."

Yep, that's what I am thinking after my very first attempt at a quilt. I didn't take any classes. I haven't read any books on the process. But, because it's not turning out perfectly on my first try, I'm over it.

Luckily, I have realized this about myself. I have come to understand that when faced with a challenge, I'd prefer to give up than push through. But, what kind of an example is that for Autumn? Not to mention, how boring is life without challenges?

So, I'm forcing myself to push through to the end of this quilt. I am going to start a new quilt following this and I am going to be more meticulous about my seams. I am going to be patient with the process. But most importantly, I am going to accept my mistakes as building blocks on my road to learning to be better. No more craft jumping and never going back. I am going to force myself to stick with things that I love doing, even if I'm not great at it from the very beginning. I know that I'll still be making a large variety of crafty things, but when I start a project, I'll finish it. And if it's not perfect, I'll have another go at it later.

Learning to be a beginner is hard. But we all have to start somewhere, don't we?

Amy

Oh. P.S. Here's a picture of all of the quilt pieces laid out in the appropriate pattern. I've sewn the first 4 rows together and have 6 rows left to do. I clearly didn't allow myself enough time. Why? Because I feel like I need to be on an expert's schedule. Goodness, I have extremely high ambitions and very little patience (or grip on reality, for that matter).


Thursday, August 18, 2011

Thoughtful Thursday: Cloth Diapers!

We've been cloth diapering for 3 weeks now. Yep 3 weeks!

WHAT?! WHY?!

Well... there are a lot of reasons!

1. Cost! If we had kept with disposables, we would have spent about $2800 dollars on diapers and $800 on wipes. That's a total of $3600 just to keep our baby from pooping and peeing all over our carpet. Instead, we have spent about $1000 on a really good set of diapers and cloth wipes that will last from now until she potty trains. If we have a second baby we will save a total of $6200 ($2600 saved now + $3600 saved for the next baby)! I think we totally deserve a vacation. lol. And, yes, I know, we increase the amount of laundry that we do per week by 3 loads. But seriously, that feels like chump change compared to $2600!

2. Better for the planet! So... guess what I learned recently? The average baby uses about 8000 diapers from birth to potty training. So, if the baby is potty trained at 2.5 years that's an average of 3200 diapers per year, per child. There is an average of 4 million babies born every year in America, which means there's an average of 12 million children using diapers per year. Minus the amount of babies that don't survive (that's really sad) and the small portion of people that cloth diaper. And... I figured out that there are an average of 30 billion diapers going into landfills...EACH YEAR! Yeah, that's seriously insane.

3. They keep Autumn's bum so much dryer! And... poop sticks mostly to the diaper instead of her, which is awesome! She really seems to love them.

4. I use only ONE cloth wipe instead of 3-5 disposable wipes. They are so much more efficient.

5. There aren't any chemicals in cloth diapers. Disposable diapers have lots of chemicals in them. I don't want that touching her!

6. They're super cute!! Check out our stash (minus 11 dirty diapers).

Which one is your favorite?!

Cloth diapers aren't what they used to be. The first thing Dan said to me before I bought any was, "I want them to be just as easy to use as disposables. Otherwise, I'm out." So, I went to my friend Karissa's store, asked her for some advice and she pointed me in the direction of All-In-Ones and Pocket Diapers. The All-In-Ones that I bought are all connected. All I do is put it on and take it off just like a disposable, but instead of throwing it away, I put it in a wet bag until I get around to washing them. It's so ridiculously easy. When I told my dad I was cloth diapering he said, "We did that with Marshall and it just wasn't worth all the trouble." But when I told him about how many diapers get thrown away and how they don't requite SAFETY PINS anymore, he was really excited about it, too! Well... as excited as my dad gets about things. ;)

Anyway, my Father-In-Law asked if I was going to be a cloth diapering advocate and when I said yes, he replied, "That's what we need, one more person in the world telling us how to live." And to that I reply, "Heck yes we do! Especially when it's saving a whole lot of waste and protecting our babies' booties!!!

Until tomorrow... (Dangit, I suck at Fotography Fridays),
Amy

Wednesday, August 17, 2011

WWW: Puzzle Quilt In-Progress

I'm working on a Puzzle Quilt for Autumn. It's a combination of 9-piece blocks and solid blocks that are staggered. It's pretty cute and seemingly easy to make. Just straight line sewing!

HOWEVER! For some unknown reason, I am consistently making my blocks about 1/2" smaller than they are supposed to be. I am totally confused. The squares are cut to the right size and I'm sewing 1/4" seams. So... why are they too small?!

Fortunately, it's consistent. So, I'm going to adjust the solid blocks down to the size of the 9-piecers and hope that it works.

This is the first "real" quilt that I've made. Meaning, the first quilt that requires the quilt top to be all sewn together first. The only other quilt I made her was this raggy quilt.

I do realize that I'm sewing a quilt that was not actually on my "24 things to accomplish before 24" list. So, I might replace the other quilt with this quilt, unless I find that machine quilting is fun and I'll probably make the 2 other quilts, too! Man, I'm complicated. 

Here is a picture of my work in-progress.


I'm hoping to sew 4-8 blocks per day. That should get me finished with the 9-piece patches in 3-7 days. Then I'll spend one day sewing the individual rows together and pressing them. Then the next day sewing the rows to one another in order to finish the quilt top. Then a day sewing the backing together and pinning the backing to the batting and the top. And finally 2 days to quilt the thing. And one final day to put the sashing around the sides. So... if you could keep up with that... I'm hoping to finish my first real quilt in.....hold on let me count.... 9-13 days. Woot! Oh wait, just kidding, I have company coming (YAYAYAYAYAY!!! My first college roomie is coming up!!!!) on this Sunday and she'll be here for a couple days. So... more like 11-15 days.

And because I love this baby so much, here is a picture of Autumn hanging with her friends, Pig and Ellie, on the raggy quilt I made for her. She is so hysterical sometimes!!!


Until tomorrow,
Amy

Tuesday, August 16, 2011

TST: Food

I'm sick today. And let me just tell everyone who doesn't know this to be true... being sick with an infant is NOT fun. I am incredibly lucky to have a babysitter (aka Autumn's grandmother) living right down the street who never has any problems with taking her! Now I'm able to relax, browse some blogs, and sew a little. Trying to not exert too much effort, of course. I should probably be sleeping but I really hate naps. I always feel more sick after them.

So, since I'm sick today, I figured I'd blog about some great recipes that I found online that I think would help clear my sinuses and make me feel better.

This first recipe for Congee by The Silly Pearl is great. I LOVE making congee. My mom used to make it every time I was sick. Her recipe is different than The Silly Pearl's, though. I'm going to have to try to make this new one soon!

And there's nothing like hot peppers to clear your sinuses. The cheese might not do me any good, but I'm a cheeseaholic anyway so whatever. Here's the Stuffed Jalepeno Recipe Smashed Peas and Carrots blogged.

And a new blogging pal put up this delicious looking recipe that I am dying to try. Ruffled Love's Oven Baked Fish. 

Yum! I hope you like the recipes and maybe I hooked you up with new blogs that you'd like to follow!

Stuffy Nose Out,
Amy

Monday, August 15, 2011

MM: Weigh-in 3

So, I've been skipping out on these posts in the past 2 weeks. Last week I refused to post because it was my birthday and I didn't want to think about my weight that day and the week before I just plain forgot.

I did weigh myself this morning, and the result is not surprising based on how many "birthday dinners" I've had in the past week. Haha.


Amount gained or lost:  

+3. At least it's not +10 which is what I was expecting. I think I can get back down pretty quickly though.

What were my obstacles last week?

It was my birthday and I milked that alllllll week long.

What are my goals for this week?

Eat more regularly.
Stop eating out so much.

Any random thoughts on weight-loss last week?

Man, I've had the same thought for like 2 weeks now that I keep forgetting to write down and of course it's completely out of my mind right now. When I remember (correction: IF I remember) I'll write it down for next time.

What's this week's mantra?

No More Excuses! 

Any changes to the plan?

Nope.

Until tomorrow,
Amy

Friday, August 12, 2011

FF: Another year older and maybe a tiny bit wiser.

Okay, so... I haven't blogged in over a week. And a lot has happened in said week. Most importantly, though, I turned 23. Yep...

I didn't want to turn 23. Not because I don't want to get older. I'd be happy with 24. It's just something about the number that I don't like. 23... ick.

And yes... I know I'm weird!

In honor on my 23rd (*shudder*) birthday, I've made a list.

24 Things I Want to Accomplish Before Turning 24

1. Lose 60 pounds (YAY for only 60 more to go till I reach my goal!)
2. Make The Sand Pebbles Quilt (32 x 32") from start to finish.
3. Make the top of The Farmer's Wife Quilt. Dan got me the book for my birthday! LOVE HIM!
4. Read The Complete Book of US Presidents.
5. Memorize the Presidents' order and their years in office
6. Read These High, Green Hills (I've been reading this off and on for over a year... it's time to finish it!)
7. Read The Time Traveler's Wife.
8. Read one book from the BBC's top 100 list.
9. Memorize locations and names of every country (minus those random islands)
10. Teach Autumn Sign Language
11. Go out dancing one night.
12. Learn 2 dinner recipes
13. Learn 2 healthy-ish dessert recipes
14. Use up all of my fabric.
15. Cloth Diaper for the entire year.
16. Learn to take better photographs.
17. Take 6 month and 1 year photos of Autumn with my new photo taking skillz.
18. Go on vacation to a new place.
19. Eat at a Brazilian Steak House.
20. Research Adoption and Foster Care.
21. Help someone that needs help whenever they need it.
22. Get a manicure and a pedicure
23. Make a new friend.   COMPLETED! I've made like 15 in the past week. lol.
24. Practice patience on a daily basis.

The obvious missing thing on the list is: Be a great mom to Autumn and put her before every other agenda I might have.

Do you think I can accomplish all of these things? I hope I can!

-------------------------------------------------------------------------------
And... because it's actually Fotography Friday and NOT Thoughtful Thursday, here is a picture of Autumn. My mom bought her this dress before she was born. It is 6-9 months. I've got an awesome child. That woman in Target who told me, "You will have champion" was spot on. :)

I know everyone thinks we are twins... but I totally think she looks like her Daddy here!

Until I find the time to blog again,
Amy

Wednesday, August 3, 2011

WWW: My First Tutorial!! Stuffed, Crinkly, Taggy Toy!

Autumn’s Grandma took her again this afternoon and I was able to finish her stuffed, crinkly, taggy toy! Now I get to share with you my first ever tutorial! I hope you find it useful!


I’m linking up with the following blogs this week:
BCD-round-button-show-and-tell-2-copy-300x300

First up: What you need.


002
042
    1.   Water (for rehydration, of course!)
  2. Sewing Machine
  3. Ribbon
  4. Crinkly plastic. (I used old candy bags that I  had save since Halloween!)
  5. Scissors
  6. Pins
  7. Thread
  8. Seam Ripper
  9. Six pieces of fabric in the colors of your choice
  10. Cutting Board
  11. Ruler
  12. Rotary Cutter
  13. Fabric Pen
  14. Polyester Fiberfill
  15. Lighter (optional)
  16. Knitting Needle (optional)


Getting Started:
A. Cut 6 pieces of fabric into 4 inch squares.
B. Cut 6 pieces of crinkly plastic into 3.5 inch squares.

007

C. Pin one piece of plastic to the wrong side of one piece of fabric

008010

D. Pick any stich you want and sew the fabric to the plastic in any pattern you would like. I did this because it seemed like it would be a really big pain to have to pin the plastic to the fabric and the ribbon when sewing the entire thing together. It’s very slippery! So, to make it easier, sew it together before hand.

011 015

E. Repeat Steps C and D for all pieces of fabric. Note: Make sure to pull the loose top thread through to the bottom. Tie a knot with the top thread and the bottom thread on the wrong side of the fabric and cut ends.

016

F. Cut a bunch of Ribbon. I cut waaaaaay too much here. Cut however much you think you’ll need.   Use lighter to burn the ends of the ribbons to keep them from fraying if you want to.

018

G. Take your cutting board, ruler, and fabric marker and mark a dot 1/4 inch in from each corner, as shown. Do this for ALL corners on EVERY piece of fabric.

019

H. Decide on the pattern and lay them out in that pattern. Take the first two pieces. Lay the ribbon down in whatever pattern you desire on the right side of the bottom fabric and put the other piece on top of that. Right sides together! Pin the fabric together.

022

I. Sew the two pieces together using the dots that you marked in the corners as your guides. Make sure to start and stop on those dots. Back stitch to secure at each end.

024

J. Repeat steps H and I for the next two pieces of fabrics until you end up with this:

027

K. Now you’re going to take the next piece of fabric and pin it to the top of one of the middle pieces. Matching up the seams and dots. See below. Pictures often speak much clearer than words.

028

L. Sew these together. Remembering to start and stop at the dots and backstitching for extra security.

029

M. Do this again on the other side of the yellow, to end up with this:

030

N. Now, to start making the cube you’re going to sew (based on the above picture) the right side of the blue fabric to the top part of the green fabric. See below:

033 034

O. Next sew the purple to the green in the same fashion.

035

P. Sew the orange to the purple and the blue. We’re almost done!

036

Q. Sew the red to two sides, leaving one side completely open for now.

038

R. Sew the red and green together leaving a small opening that you will be able to turn the fabric through. I like having it in the middle since it’s easier to slip stitch the middle than it is to slip stitch the corner.

039

S. Turn right side out and start stuffing with Polyester Fiberfill! Use the knitting needle to get it down into the corners.

040
041

T. Finally, slip stitch the opening closed and (WOOHOO!) you’re done!!!!

044

Give to baby and let the fun begin! Smile


--------------------------------------------------------------------------------------------------------
I hope you enjoyed the tutorial and that it was clear enough for you to follow! Let me know if you try it and how it goes!
Until tomorrow,
Amy